
Tutorial: Creating a Color Gradient
The picture above shows an effect that you may wonder how it has been created. This tutorial guides you in the simple task. The main ingredient is a collection of 1D spectra that you are supposed to own on your hard disc. Much better if you keep them into the same folder (as this tutorial assumes). If you only have a single spectrum, no problem: you can create ten copies of the same. The main tool is iNMR version 2.2.5 (or later). We are going to create a simple blue-red gradient, to keep things simple.
- Open the first spectrum and process it.
- Open the dialog Process Folder.... Select the options:
- Metabolomic Phase Correction (Automatic Phase Correction is also good);
- External Documents as Windowless Overlays.
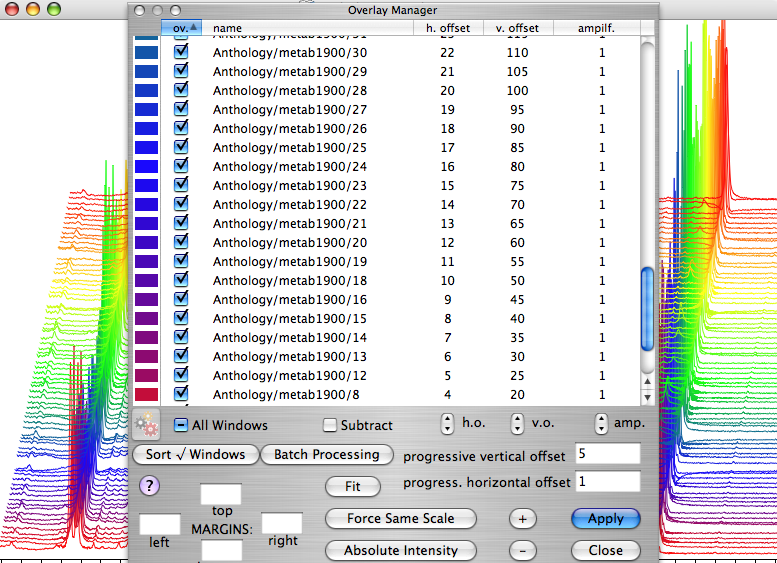
- Open the Overlay Manager, enter a small value (like 5 or 10) for the “progressive vertical offset” and click on “Apply”. Exit the dialog. This creates the stacked plot, but all the spectra still have the same color.
- Open the Console. Check the option “for all documents”.
- Enter the command:
color ({r=0;g=0;b=1;}, {r=1;g=0;b=0;}) amp()
Don't be frightened by the complexity of the statement. If you have read the previous article Customize your Lua Environment, you have already seen the color command. You know that it's convenient to declare, into the file “Lua.init”, the colors you are going to use. If you have already declared:
red = {r=1;g=0;b=0;}
blue = {r=0;g=0;b=1;}
the first command becomes very readable indeed:
color (blue,red)
while amp() is the command the draws the window content. You have a shortcut too.
Pressing the Esc key, while working with the console, is equivalent to sending the amp() command.
The complete sequence of commands can therefore become:
color (blue,red) <Run> <Esc>.
For your information, amp with an argument, like amp(2), amplifies the spectrum (twice, in the example).
If you only have two spectra, the first one will be blue, the second one will be red and you can't see any gradient.
You need at least 3 spectra to see the effect. You can declare more colors and create more gradients.
The complex gradient of the picture was created with a command like:
color (red, blue, green, yellow, red)
Can you use the same names used for the “crayons” in the standard Color Picker? Yes, but you have to declare them one by one (or you can copy somebody else's Lua.init file). In the next example I recreate the “salmon” crayon. First I pick it into the picker window. Then I switch to the “Color Sliders” pane of the same dialog. It says that the components of salmon are:
Red = 255; Green = 102; Blue = 102.
In Lua you declare:
salmon = {r=255/255; g=102/255; b=102/255;}
You see: the trick is to divide every value by 255. I forgot: r,g and b are the red, green and blue components and go from 0 (=black) to 1.